BurdaStyle polo shirt 109 03/20
This polo shirt was actually fun to put together, baring a few natural disasters along the way that I usually experience :) I didn't do any adjustments to the bust to this version, but I did add a little to the length just above the three pleats as it is a petite pattern, and I am a bit taller.
Just a quick note, when cutting out the front piece just cut one line down the centre front where the polo fastening fits (in the middle), and then at the bottom make two diagonal cuts into the two corners. This means everything will lie better when you get to putting in the polo fastening.
This material was very think which made life a bit harder too - it was easy to put a hole where you didn't want one :(.
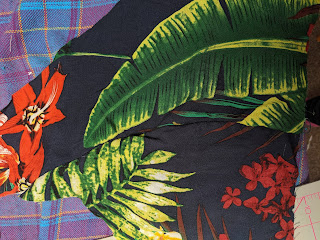
The first step is to put the pleats in the side of the shirt as per instructions - this photo is to remind me which way the pleats go.
The first step is to put the pleats in the side of the shirt as per instructions - this photo is to remind me which way the pleats go.
 |
| Adding pleats to the side (showing wrong side) |
When putting in the polo fastening you first need to sew one line down each piece down the centre, but don't go all the way to the end otherwise you can't fold the ends in like you will need to (so just follow the green lines on this photo, not the red lines)

Press in the unsewn edges along the long edge and the bottom. This is so that they are tucked away when you top stitch
Fold along the middle to the back of the top, press. The three edges should be tucked up and hidden. Top stitch.
Then do the right over the left and pin in place, at this point you can do the box with the cross in the middle. This isn't 100% right and I noticed too late that I had caught some material into the first line I sewed so that had to be unpicked and hand stitched, which has left it looking a bit rough on the left hand side. I was also a bit concerned at this point at how low the dip was. However on completion the v seemed to move up and was fine.
After sewing the shoulder seams it was time to face the collar. This is the second collar stand I had done and the instructions at this point were unhelpful. To say the least. So I dug out my Tilly and the Buttons Rosa pattern guide and followed that with BurdaStyle instructions next to it to see if they agreed on some level - which they did, although I followed the Rosa patter the most..
With regards to the material and the Coverstitch, it was a nightmare to work out the settings to stop it skipping settings. I have got enough material to make another top so I will have to have another go, if I win I will record the settings in a Coverstitch focused post.
 |
| Top Stitching |
 |
| Adding the box cross at the bottom |
Then do the right over the left and pin in place, at this point you can do the box with the cross in the middle. This isn't 100% right and I noticed too late that I had caught some material into the first line I sewed so that had to be unpicked and hand stitched, which has left it looking a bit rough on the left hand side. I was also a bit concerned at this point at how low the dip was. However on completion the v seemed to move up and was fine.
 |
| Oops this doesn't look right |
After sewing the shoulder seams it was time to face the collar. This is the second collar stand I had done and the instructions at this point were unhelpful. To say the least. So I dug out my Tilly and the Buttons Rosa pattern guide and followed that with BurdaStyle instructions next to it to see if they agreed on some level - which they did, although I followed the Rosa patter the most..
 |
| the collar band |
I totally forgot to take photos of the following stages!
Sorry, I will have to make this top again so that you can follow along properly - definately a win for us all.
I actually really liked how this worked out in the end, although there was a LOT of swearing with using my coverstitch to do the hem and the sleeves, but after a heavy discussion we got through it together! I also didn't bother with the buttons but left the v plain.
With regards to the material and the Coverstitch, it was a nightmare to work out the settings to stop it skipping settings. I have got enough material to make another top so I will have to have another go, if I win I will record the settings in a Coverstitch focused post.
Comments
Post a Comment