Yet another Tilly and the Buttons Stella Blog
I have previously made two Stella hoodies from the Tilly and the Buttons book Stretch - both times they have come out slightly differently depending on the material used (the first was using some terry towelling and the second a very fluffy sweater material). Based on other Tilly Patterns I vary between a 3 (most of my body) and a 4 (my chest). For this pattern I have cut out the straight size 3. However both these had the same issue of having pull lines across the chest - so I knew that I would need to do a FBA for my next one, which was, again, supposed to be a practice before using my lovely Kailuna material that I had on preorder. However, my material arrived, and me being me (and already having a long list of things to make) I decided that two trials were enough and just go with it.
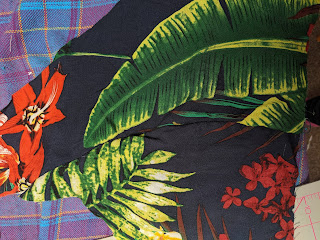
Once I got my material it was a quick trip to Abakhan to get the accessories, I picked up the thin, pale pink, ribbing from their bins for the hood lining and then the fuchsia pink cuffs are from their selection of Poppy ribbed cuff material. Can you guess the accessory I totally forgot? - I do bring it up at the end of the blog.
I set my sewing machine up to use the stitch highlighted in red below.

Update: I have now bought an Overlocker which I made my fourth hoodie with, and it did give it a lovely finish to the seams. If I carry on making stretch stuff I will probably end up getting myself a coverstitch too!!
First off I followed Maria Denmark's guide to an easy FBA on the front piece which was spot on for me, as you will be able to see from the final photos. She does do a more complicated version too but this one is the one I followed. I will say that I did it with a seam allowance which she advises against.
I followed the first lot of instructions to construct the shoulder seams and the hood. Make sure the hood centre piece is the right way up to give the neck the widest piece. When pinning the hood to the neckline do the front bit first to make sure the pieces line up together, and the button holes are lined up with each other. I was able to use my stretch twin needle to make this look nice as the material was the thin terry towelling. The needle does not work on thicker sweater material.
I follow the TATB instructions pretty well, except I always do something silly, and this time it was sewing the arms, that little bit at the end, at first I thought it would be sewn up when I did the under arm and side seam (as it's been a while from doing my two trials), but on sewing them this did not work so I had to unstitch and restitch the last bit of the arm pieces before doing the side seams. Update: I struggled to keep this bit a clean angle when using the overlocker but you can't tell when everything is put together
As you can see I used the zigzag stitch with the straight stitching for all my seam stitching (the stitch highlighted in red on my stitch diagram).
I didn't need to do the normal bit with the cuffs I just needed to cut the cuffs to length using the cuff ribbing I bought. To be honest I probably wouldn't use this ribbing again, I didn't like it as the cuff seam is visible on the inside of the cuff, when doubling your own cuff material you can't see it, also makes lining them up very important as there is no fold to make it all look neat. I would also say that one packet only just works, and if I am honest the one around the hips is a bit tighter than I would have gone if I was making the ribbing from scratch so getting it to fit right was a bit harder than normal. I tend to guess the waistband size but there are some great calculators out there too - like this one from The Last Stitch
I would say that this cuffing does seem more hard wearing than "normal" ribbed material (which on my two tester tops is starting to bubble). I used the stitched highlighted in black in the diagram above for seams for the cuffs and waistband, and to attach them to the top. I am thinking about using the twin needle to "finish" the waistband but I'm not sure how that would look so holding off the moment.
One thing to note with the Stella hoodie is it does come up very long, I quite like it but it does impact on how it sits when you add a band across the bottom - especially if it rides up the band makes it poof out a lot more than ideal

 |
| Kailuna flamingo material, Abakhan pale pink ribbing and Poppy ribbed cuffs, Gutterman thread |
I set my sewing machine up to use the stitch highlighted in red below.
Stitch Choice
Update: I have now bought an Overlocker which I made my fourth hoodie with, and it did give it a lovely finish to the seams. If I carry on making stretch stuff I will probably end up getting myself a coverstitch too!!
First off I followed Maria Denmark's guide to an easy FBA on the front piece which was spot on for me, as you will be able to see from the final photos. She does do a more complicated version too but this one is the one I followed. I will say that I did it with a seam allowance which she advises against.
I followed the first lot of instructions to construct the shoulder seams and the hood. Make sure the hood centre piece is the right way up to give the neck the widest piece. When pinning the hood to the neckline do the front bit first to make sure the pieces line up together, and the button holes are lined up with each other. I was able to use my stretch twin needle to make this look nice as the material was the thin terry towelling. The needle does not work on thicker sweater material.
I follow the TATB instructions pretty well, except I always do something silly, and this time it was sewing the arms, that little bit at the end, at first I thought it would be sewn up when I did the under arm and side seam (as it's been a while from doing my two trials), but on sewing them this did not work so I had to unstitch and restitch the last bit of the arm pieces before doing the side seams. Update: I struggled to keep this bit a clean angle when using the overlocker but you can't tell when everything is put together
 |
| This is the added stitch from the body piece side. |
As you can see I used the zigzag stitch with the straight stitching for all my seam stitching (the stitch highlighted in red on my stitch diagram).
I didn't need to do the normal bit with the cuffs I just needed to cut the cuffs to length using the cuff ribbing I bought. To be honest I probably wouldn't use this ribbing again, I didn't like it as the cuff seam is visible on the inside of the cuff, when doubling your own cuff material you can't see it, also makes lining them up very important as there is no fold to make it all look neat. I would also say that one packet only just works, and if I am honest the one around the hips is a bit tighter than I would have gone if I was making the ribbing from scratch so getting it to fit right was a bit harder than normal. I tend to guess the waistband size but there are some great calculators out there too - like this one from The Last Stitch
I would say that this cuffing does seem more hard wearing than "normal" ribbed material (which on my two tester tops is starting to bubble). I used the stitched highlighted in black in the diagram above for seams for the cuffs and waistband, and to attach them to the top. I am thinking about using the twin needle to "finish" the waistband but I'm not sure how that would look so holding off the moment.
One thing to note with the Stella hoodie is it does come up very long, I quite like it but it does impact on how it sits when you add a band across the bottom - especially if it rides up the band makes it poof out a lot more than ideal
Here is the almost final piece - I was too excited to try it on - notice the one wrist band is missing and no ties for the hood - something I forgot to buy on my shopping trip!

Notice no lines around my armpit/ chest - I might try a photo of me in one of my trial hoodies too so you can see the lines I am talking about.

Comments
Post a Comment