BurdaStyle 05/2019 Dress 102
I have tried this dress twice now, both using material provided by my mums 1970's and 1980's stash. I really like how this dress is finished, and the pockets are a real bonus for me, however it has required modifications. The first dress I did was in black with bright yellow flowers, and the bodice at the front was huge above the breast. The second in the red/brown material with small flowers where I tried to adjust for the bagginess.
As per every Burda Style pattern there seems to be a lot of instructions in one step in some places and not all of the instructions are as clear as they could be for anyone with less experience. I will first summarise the two different attempts and then go through the dress construction again. Both these dresses were tests for when I make it out of some more Moon wool I have from my pre Christmas splurge at Abakhan. The idea is to make this and a smart jacket out of coordinating wool from another issue of BurdaStyle.
I also couldn't quite work out the bias binding around the arms, which means the final product does look a bit wonky as I tried two different ways and one took up more material than the other.
 |
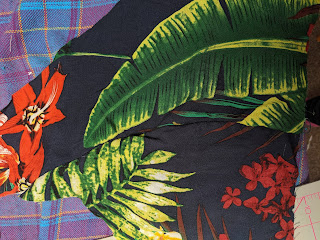
| A photo of the dress from the magazine |
The first attempt
I didn't hack it at all before I tried to put it all together, this then meant I had to modify it as I went - reducing the back at the top for my narrow shoulders, and at the middle to compensate for the sway back. I had a lot of spare material at the top of my chest that I needed to reduce for my second trial, this distracted me from noticing that it was too tight across the breast itself which I only noticed after the second attempt. I was able to resolve the bulkiness by creating darts in the dress at the neckline but I didn't make them big enough, they would have been too bulky as I didn't unpick the lining to put them in.I also couldn't quite work out the bias binding around the arms, which means the final product does look a bit wonky as I tried two different ways and one took up more material than the other.
The Second attempt
With the second attempt I attempted a narrow shoulder adjustment (method 2) to the front and to do the back adjustment from pattern stage using my first attempt to make the new patterns. The narrow shoulder adjustment to the front worked, however I had to drop the neckline more and that affected the facing which I forgot to adjust for. At this point I noticed that it does look like it is pressing my boobs down a little, I did think this is more from over indulgence at Christmas than anything else :D, but trying on my original attempt (now) gives the same affect. To reduce the effect I moved the darts, not the horizontal position, but I had to shorten the length of them a bit, which was not expected from the instructions I followed for the modification. I'm not sure if this is a glitch so a third go might help me work that out..
The narrow back adjustment to the back worked well too. At first it didn't but with some unpicking of the zip and moving it a little it work well (at first it pulled the material in all sorts of interesting ways at the back). This did take ALOT of unpicking and tacking back together.
I didn't have this issue with the first attempt so will have to assume that it was something I did during construction. To be honest I am now really thinking a third test dress wouldn't go amiss at this point...but I'm not sure how I feel about 4 dresses the same in my wardrobe! :D If I do a third one I will do another blog on that - and I will admit I ain't lining that bugger as it just adds to the pain at this point.
I didn't have this issue with the first attempt so will have to assume that it was something I did during construction. To be honest I am now really thinking a third test dress wouldn't go amiss at this point...but I'm not sure how I feel about 4 dresses the same in my wardrobe! :D If I do a third one I will do another blog on that - and I will admit I ain't lining that bugger as it just adds to the pain at this point.
Constructing the dress
I really didn't like the instructions for this dress at all and felt it did things in a weird order for no reason.
- The first thing I did was the darts on all pieces of material - I hate doing darts so like to get them over and done with
- I then put together both for the main material and the lining at the same time
- Sew together the front side pieces to the front pieces - iron.
- Sew the waist band to the front and back pieces - don't forget to iron - in fact I will assume you have ironed after each stage.
- Add pockets to the skirt piece (actually this magazine does have some helpful photos for this point as part of the skirt tutorial)
- Add skirt pieces to the bottom of the waist band - make sure that the width is the same all around and for both the lining and the dress.
- Join the front to the back using the shoulder seams - keep checking the waistband alignment.
- At this point I added the facing to the lining. This caused me some confusion as I was having a right moment.

Put the wrong side of the facing against the right side of the lining and match up the top neckline before basting along that edge. Then sew along the bottom edge - Join the side pieces together - again make sure the waistband is aligned.
- I then sewed up the lining between the zip marker and the hem
- You now essentially have two dresses.
- Add the zip - I put the top of the zip to the top of the material. This worked out fine for when I added the lining.
- Now it was about adding the lining to the dress. I put the right side of the dress against the right side of the lining. I then used LOADS of pins around the neckline as it had a tendency to bunch up badly.

The lining folded in at the zip point - Once the neckline has been sewn across the top edge you will need to lift the lining up and edge stitch again as close to the seam as possible on the inside of the dress. This will hold everything in place. At this point I then trim as close as I can to the neck edge stitching. Iron (I know I wasn't going to mention it again but it is really important here).
- I didn't top stitch the neckline as it kept bunching up, this was most likely due to the ad hoc mod to the neckline I did without doing the same to the facing (as you can see the facing is out of line from the neckline on the photo of the pins above).
- Now the hand stitching comes out to sew the folded edge of the lining to the zip edge.
- To do the bias binding to the arm edges I machine stitched the bias binding to the edge of the sleeve, right side to right side (I pinned and then tacked it first). I then folded over on the first fold/ stitch line. Leaving the bias binding at the widest setting, with the second edge folded in I then hand stitched the binding to the lining of the dress. Again I didn't top stitch as it kept bunching up.

Setting the bias binding to the sleeve - To do the hem of the dress I folded once at 1.5cm and ironed it, then folded again 2cm and ironed, I then fixed the hem with small hand stitches.
- Then you can see where to hem the dress lining to I did it so the finished hem sits just about 1cm above the stitches for the dress hem. Just remember to fold the lining back to do the hem (I didn't so it doesn't look pretty so I will be double folding it up as per the dress hem to hide the rough edges) :)


 |
| All the pins in the world |


Comments
Post a Comment