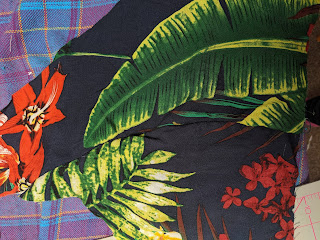
BurdaStyle 04/2019 111 Trousers with fly
These trousers where a real challenge for me, as they were for the taller sizes and I wanted to make them cropped (which I was slightly over zealous about), along side this I had not done a fly zip before and doing it with self facing pieces and no waistband added some extra fun to the experience as all the online guides did it differently, and as usual the instructions were not as helpful as they could be. I finished them and they are, well, OK. BUT I had to do a lot of tweaking. Although the patterns said the only difference was in the length and to use material with a stretch in they came up way too big at the front - not sure why only the front though. They could be maternity pants without any adjustments!
Things I had to do to make the trousers fit:
- Bring in the sides by the pockets, only a little bit as the pockets make it impossible to bring in too much
- Tapered in the sides of the legs all the way down as they were much too wide.
- Made the first front darts wider at the top
- Unpicked the facing and added second, longer darts to the front
- Reduced size of facing from the sides to stop having to modify the fly
- Didn't bother with a button at the top of the fly - after all the adjustments the material rose to a bump at the top so I got rid of that, and the space for the button at the same time.
- Tack the zip in to the front pieces after adding the pockets and before doing the side seams
- Measure, measure, and tack to check fit
- Make them slightly longer - they are more long shorts than short trousers
- Not bother using stretch linen - these trousers did not need any stretch to them!
- Not bother with interfacing on the facings - or use thinner material. With the interfacing in place and all the material by the zip the buttonhole was a complete nightmare and I ended up having to hand stitch it.
- Believe the instructions with button placement. I didn't and moved it in a bit and it looks a bit silly where it is. It works but not ideal.
For some of the process I struggled with the instructions so where I struggled I have taken some photos to help the process along a bit.
Adding the pockets
After struggling with the pocket positions due to the additional facings I bought BURDA 08/2019, and yep you guessed it a perfect pocket guide was included in this edition. Sigh. Still not too shabby an effort :D. I am guessing in future editions there will be a brilliant guide to doing the fly correctly too! (Not that I am bitter).
Inner Leg Seam finishing
I was concerned that doing a French seam would be too bulky around the crotch area, and wanted to reduce the bulk and making sure it looked nice. I wish I had done this everywhere, this was just the rough ends folded over and sewn up. It looks really good and is handy if you want to do roll ups on the bottom of the trousers.
EDIT: As I had to unpick everything to narrow the trousers, I did indeed do this seam finish for all the leg seams.
The Fly Zip.
This is where my mind broke. The instructions were one massive paragraph and made very little sense to me as I had never done a fly zip before. Tilly you have let me down LOL! I do normally refer back to the Tilly and Buttons books if I get stuck, but there was no help this time. (Although I see she is doing a sew along to her Jessa trousers so it is possible there will be a guide available in the near future) So after a lot of browsing around the internet for simple guides that weren't videos (I hate having to stop and start them all the time) I came across this one, which steered me in the right direction: https://closetcasepatterns.com/sewing-zipper-fly-front-sasha-trousers/. I did have to have two goes at this - to make sure you don't - ensure when you are doing it that you do place the zip 2cm down from the top of the trousers - giving room for the button :)
 |
| Adding the zip - tacking it before sewing |
 |
| Pinning on the fly guard. |


Comments
Post a Comment