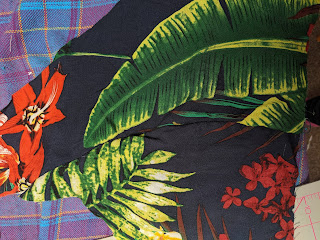
Childrens shorts I thought, only three pattern pieces, it will be easy I think. Especially as I have made my own shorts a couple of times now. I was wrong. I used thin cotton as the weather has been getting hot here and thought a nice loose pair would be spot on for the daughter AKA TD. I will admit to tweaking this pattern a tiny bit at the end, I had a lot of 1 inch elastic so I used one band of that to go around the waist. I also didn't use the Burda measurements but just ran it around TD's tummy and used that amount.
TD traced out the pattern pieces on the material, and "helped" cut them out. I then put them together. I decided to use French Seams as the material was prone to fraying and I didn't think it would cause any issues - it was a nightmare with the pockets and the vent on the side of the shorts. I think next time it would need to be done with a Hong Kong finish. I may well try again.
Things I messed up - having done pockets before with no issue I tried to follow the instructions given to create the pockets in the shorts here, this worked (sort of) on one side but there was some major bunching up on the other side.I don't know how I did it but it all went wrong. The other bit I go confused on is putting the legs together, I know this is a "simple" bit and done before with PJ's and shorts, but for some reason, today, I got confused and tried to sew both legs together at seam 2. Not enclose one leg and then the other. That was quite a moment of unpicking.
 |
| A picture of joining seam 2 correctly :) |
Putting the two legs inside each other was the easiest step :)
 |
| Leg inside leg |
I got totally confused with the waistband, there seemed to be so many steps to this one, I will admit at this point I decided to go my own way.
- I folded the waist band to make a circle, and checked it against the waist of the shorts, pinned and stitched the short side.
- I then matched the seam of the waistband to the seam at the back of the shorts. Here I added a little tag so TD could easily see which was the back.
- I had right sides together of the shorts and the waistband, pinned and stitched.
 |
| Pinning waistband to the shorts. |
- I then got my piece of elastic (as above) and sewed that into a circle too.
- I folded the waistband "hem" about 1 cm down wrong sides together and iron.
- I then folded the waistband in half wrong sides together and ironed.
- I then pinned the edge of the hemmed piece down into the inside of the shorts, enclosing the material that was overhanging the shorts from stitching the waistband on so it was all neat.
- I then stitched as close as I could to the seam of the waistband - catching the hem that we ironed in above.
Then it was on to hemming the shorts. because I had done French Seams down the sides I ended up having to hand stitch the rolled hem for the vents and then machine stitch the hem around the bottom of the shorts. This was a quick sew, but as usual the instructions were challenging for me but I managed to use up most of my spare material from making a Victorian romper suit (will post about that later), so that was good. I will update this post of my daughter wearing them when she is up. If she likes them. If she wears them.


Comments
Post a Comment